


DIY Kitchen Backsplash Before and After Ideas
|
|
Time to read 11 min
|
|
Time to read 11 min
Kitchen backsplash tiles can begin as a basic element; simple tiles or plain paint, or builder-grade surfaces that serve a purpose but little for the entire look of the kitchen. This "before" kitchen can end up looking bland and disconnected over time, even if everything else is in perfect working order. It's that spot where it takes up more room than you want, making the whole room feel less inviting.
The fascinating part is in the amount of power provided by this one wall. Since the backsplash is the part of the kitchen that is behind all the building elements, it becomes the part of the space that particularly catches the eye. There is a magical effect of changing a little here, and the kitchen becomes warm, fashionable, and characterful.
Backsplash makeovers are always really exciting because they create confidence. Real before and after transformations are the proof that the need for big changes doesn't always require big budgets and the involvement of professional teams. In many cases, simple and ingenious do-it-yourself techniques such as peel and stick tiles, patterned paint, or beadboard panels can produce surprisingly elegant do-it-yourself solutions that can be produced with basic tools and do-it-yourself effort.
We're going to take a look at some actual kitchen backsplash tutorials as well as the best DIY kitchen backsplash ideas in this tutorial. Whether it's a budget-friendly option or a creative design, not only will you get ideas, but there will also be some simple steps you can take to make your own beautiful before and after.
This section anchors the entire article: real people, real kitchens, real transformations backed by affordable methods and clear installation choices.
The "before" kitchen was clean, but very simple; plain white walls, gray countertops, and a backsplash area that had a cool and lifeless feel. As you can see, many rental kitchens appeared to be perfectly functional but completely uninviting and unappealing. The tenant desired a comfortable and fun space where he did not want to make any permanent changes that might impact the security deposit.
Low-cost peel and stick tiles cut into squares and pieced into a design pattern are used to create the transformation. These white and post-fired orange tiles were cut and stacked to form a handcrafted, textured, and special touch effect. This was a whole backsplash makeover for under and done in an afternoon. The update made the plain wall a creative and inviting centerpiece, truly of one's own design.
Key Takeaway: Cutting and rearranging peel and stick tiles can create a more unique and expensive-looking backsplash design. Two complementary colours complement each other as well, which gives depth, personality, and a more custom handcrafted look to the kitchen.
● The Before: Previously, the kitchen was in good condition and appeared bright and clean, but the homeowner was unable to enjoy it for long because it seemed lacking in feeling. The white cabinets, white countertops, and blank walls were such an integrated whole that the space was lacking in energy, texture, and character. It was a neat, well-functioning kitchen, but it didn't seem warm or inviting at all, like many modern kitchens.
● The After: it got richer with the addition of rich green zellige tiles and forest-themed wallpaper. The ‘Moroccan' tiles, which were handmade, evoked the desired texture, a glint of her niece's colours, and some natural colour variation, and the wallpaper joined the rest of the room with a ‘carpet' quality finish and cozy atmosphere. It had looked like a complete thing to the naked eye after the kitchen. The kitchen was suddenly a more layered, stylish, and with personality.
● Key Takeaway: Textures and patterns can completely change the design impression in a flat kitchen, making it warm and adding a designer touch. Zellige tiles contrasted with wallpaper add depth and charm and enhance the visual richness without requiring complete renovations.
● The Before: Old backsplash tiles adorned in colors and patterns that were outdated and tired the kitchen. Although the tiles were still strong and hadn't sustained any damage, pulling them up entirely seemed costly and messy. The home buyer was looking for something simple yet elegant for the kitchen area to make it a more welcoming space.
● The After: The old backsplash was not removed, but was painted with tile-safe paint and modern patterns or designs. Simple stencil patterns and tape lines: gave it a fresh look with this stylish technique right over the surface. The kitchen looked brighter, cleaner, and much more modern, even after this makeover wasn't done on site, with no demolition work involved.
● Takeaway: It's not always necessary to replace old backsplash tiles. The old tile can be readily and cost-effectively transformed into a beautiful new feature with the proper paint and preparation.
● Before: Initially, the walls of the rental kitchen were plain and empty, creating a cold and temporary atmosphere. The kitchen was completely devoid of texture or decoration, giving it very little warmth or interest, and the low ceiling added to the room's smallness and lack of welcoming quality.
● After: To soften the space, beadboard panels were cut to fit the backsplash area and painted in a warm cottage style. After installation, the panels have created a real sense of texture, depth, and even a snug built-in feel that has really made the kitchen feel a lot more cosy and welcoming. The resulting backsplash was more of a nice custom addition and not a rental window treatment.
● Key Takeaway: The addition of beadboard to a kitchen without the use of tile is a simple way to bring warmth and character. It lends a cozy, tranquil ambiance and can be repaired, removed, or refined with ease at a later date, making it an excellent choice for renters.
● Before: The small galley kitchen was dark with shiny old countertops and empty back walls that didn't enhance the area. The owner was looking for a bright, elegant appearance of natural marble, but they did not want to pay the price for a full stone installation, and the process was too time-consuming.
● After: Transformation was achieved by using large-format peel and stick marble-like sheets, which were placed directly on top of the wall surface to create the transformation. The sheets were easily cut by a utility knife, and the veins were easily matched, resulting in a more realistic and seamless effect. The kitchen looked instantly brighter, cleaner, and rather more luxurious after the edges were sealed in just one afternoon.
● Key Takeaway: Marble-look peel and stick backsplashes are simple and inexpensive to achieve a high-end feel to your kitchen. They're ideal for rentals, temporary spaces, or low-cost facelifts and transformations that create a dramatic result.
You don't have to renovate your entire kitchen to achieve a beautiful backsplash look. Even a plain kitchen can look brighter, warmer, and definitely more stylish, with the right DIY technique, in no time at all. Whether it's peel and stick tiles, painted designs, or textured panels, these are some of the most popular backsplash ideas that will give you a dramatic look without the price tag. These DIY kitchen backsplash ideas are perfect for homeowners and renters.
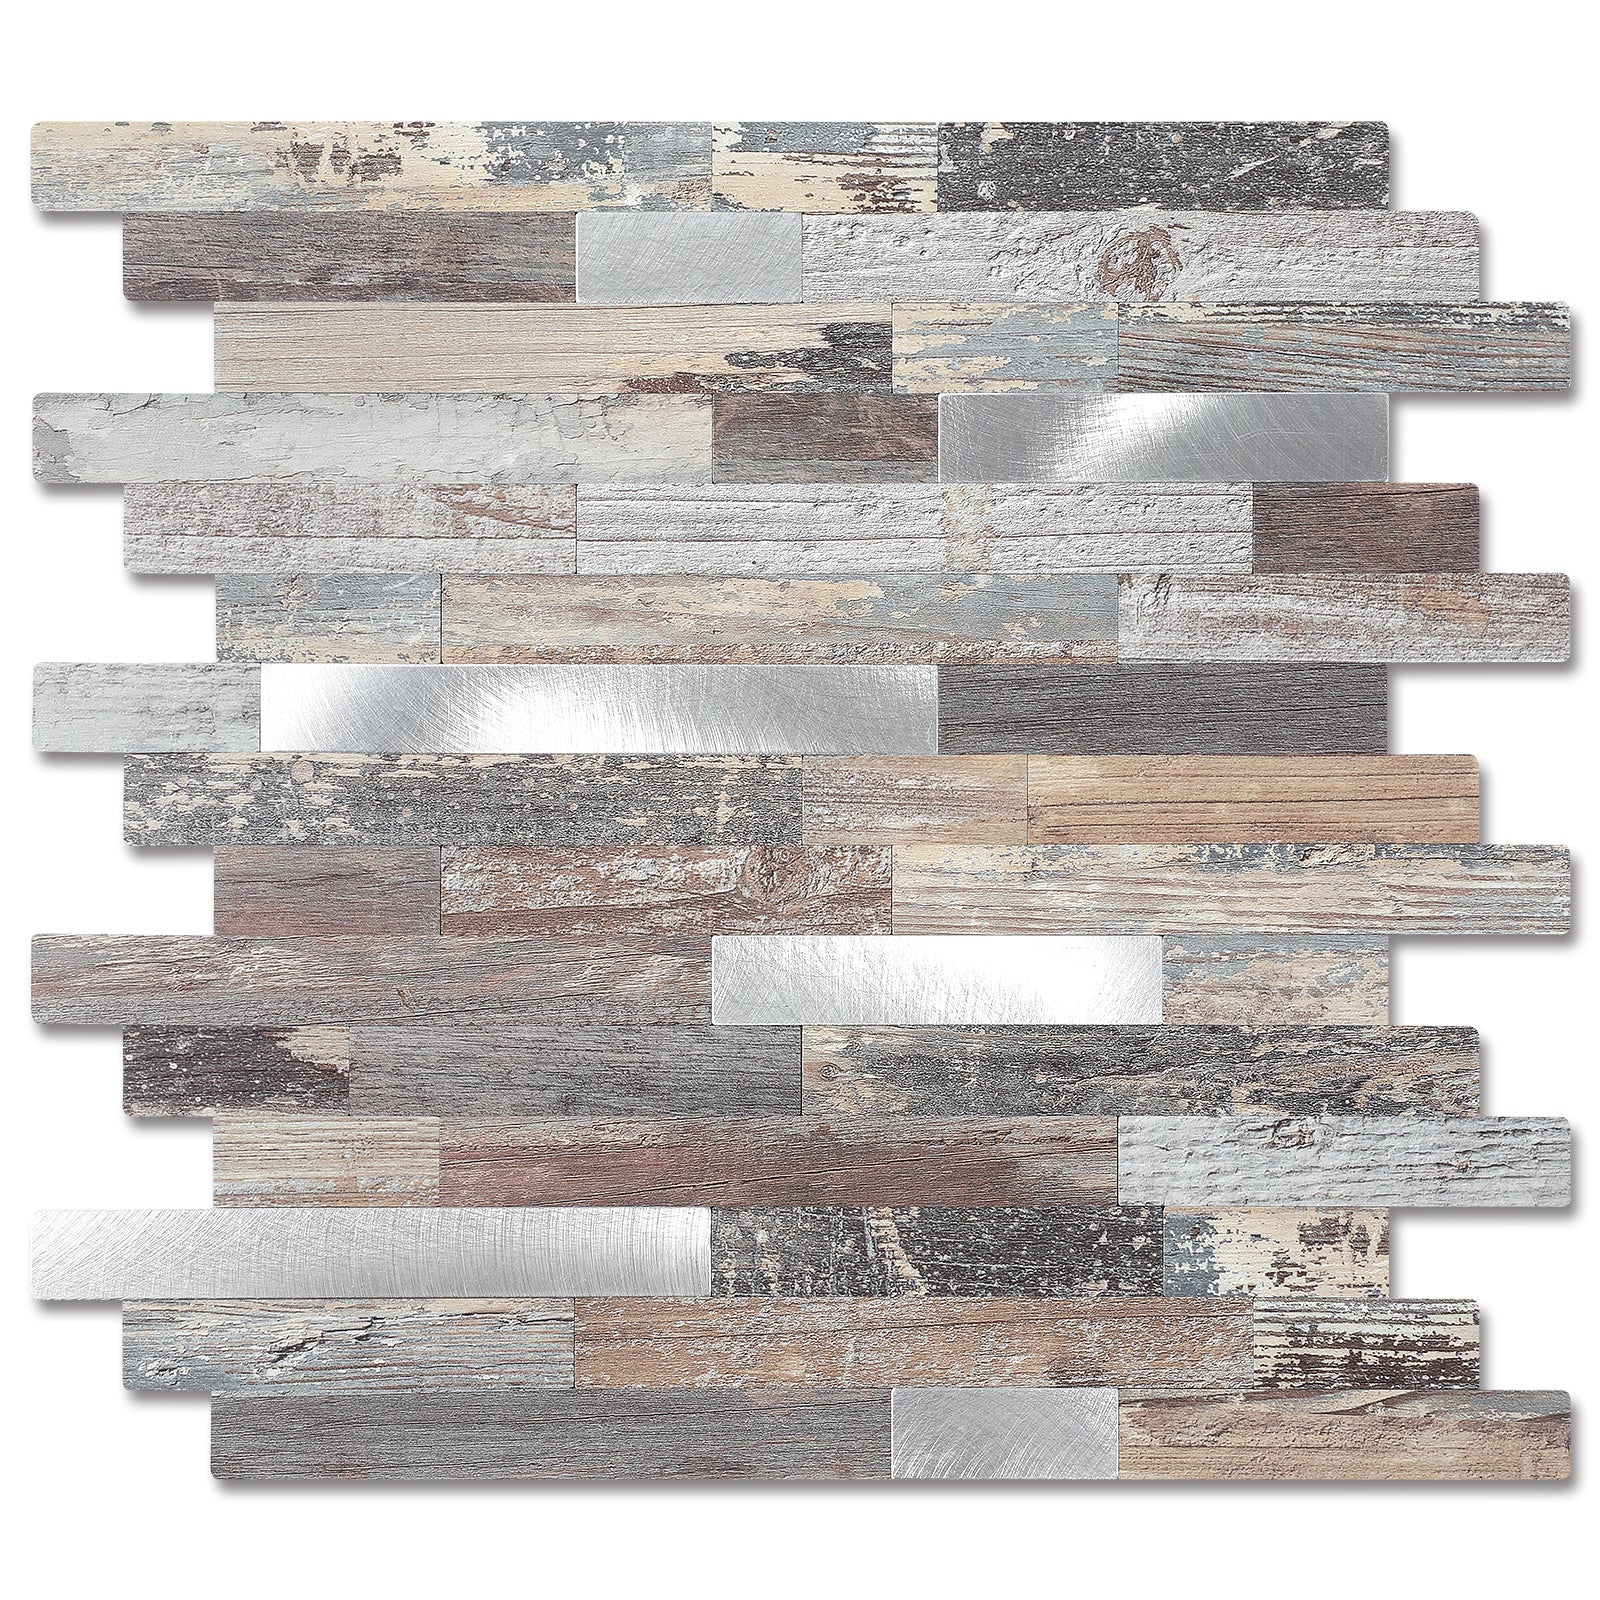
Peel and stick tiles are one of the quickest and easiest methods of changing a kitchen backsplash. Homeowners can achieve that luxury look without the hassle of grout or complicated installation with these self-adhesive panels in marble, subway tile, stone, wood and geometric designs. They are installed over smooth walls, which means that there is virtually no transformation noticeable.
They work well for renters, are an easy and budget-friendly remodel, and are ideal for weekend do-it-yourself projects. Just wipe the wall, measure carefully, peel and press the tiles on the wall.
A utility knife can be used for cutting around corners and around outlets to achieve an even look.
What it is: A painted backsplash is an innovative and budget-friendly solution to rejuvenate tired walls or dated tile. You can achieve a fun and chic fake tile effect with kitchen-safe paint, stencil, or geometric tape pattern – for a small fraction of the price of real tile.
● Before and After value: This works best in kitchen areas that are utilized for lighter cooking. A protective top coat will enhance durability and make cleaning up easier, while maintaining a fresh and modern feel.
● What it is: Beadboard and wood paneling are materials with tongue and groove panels that are cut and then sized, which you can install with adhesive or brad nails. They are painted after installation.
● Best use case: They are suitable for use in spaces where you want an aesthetic ambience without any heavy materials. Beadboard and wood paneling work best in cottage, farmhouse, or coastal kitchens.
● Before and after payoff: Flat, blank walls develop architectural dimension. Since beadboard is paintable, you can change the color as often as you repaint, which multiplies the before-and-after potential over time.
● What it is: Removable backsplash panels are great for renters and temporary spaces. Lightweight metal or faux tin panels (or acrylic panels) can be installed in no time and without grout or permanent adhesive.
● Where it shines: These panels can be particularly handy behind stoves as they are simple to wipe down and can provide a shiny, textured, and contemporary appearance to the kitchen.
● Render angle: Patches and mixed materials: high character and low cost.
● What it is: Use a variety of different materials for the backsplash for a more personalized and creative design. When it comes to decorating your home, many people use the remaining tile, peel and stick, or use small stone pieces to create an interesting layered design.
● Before and after payoff: This approach is keeping costs down and adding a special touch to the kitchen that's purposefully designed. A small mixed-material element behind the stove can make a considerable before-and-after statement.
Here is the before and after blueprint of the transformation plan for readers:
Knowledge is key to the beginning. The backsplash you have could be smooth drywall, existing tile, shiny paint, or slightly textured walls. This is an important step, because every surface requires its own preparation.
Take good "before" photos before starting any work. Take these types of photos: wide shots, close-ups, and corner photos. The advantage of these pictures is that you can observe your progress and will further add value to the finished galaxies once you have made comparisons.
The kind of backsplash that you want to have should be based on your budget, lifestyle, and skills.
Budget: Paint/work is generally priced under $50, peel and stick is priced at $50-$250; beadboard is priced at $100-$400; and metal panels are priced at $100-$400.
Permanence: For renters, peel and stick panels or removable options are best, while homeowners can opt for a longer-lasting option of paint or tile-over-tile.
Skill/Time: The popular peel and stick option takes a few hours to a weekend, compared to the more time-consuming stencil-and-beadboard option, which is still a great option for beginners.
The length of the finish is determined by the preparations. Use degreaser or rubbing alcohol to thoroughly clean the surface and strip away grease, dust, and cooking debris. This may cause peeling paint and missing tiles.
Then fill small holes, smooth rough surfaces, and wipe the surface again. Use a level to be sure your first row is straight. When Painting, use primer first and base coat second, and ensure that it dries correctly for the best finish.
Always be careful before deciding to completely cover a wall. If using peel and stick tiles, try one in a small, inconspicuous spot and allow it to bond for 24 hours, and see how it goes. If the design is for a stencil, try it on an extra board or an area behind an appliance. This allows you to view the flow of paint, pressure on the stencil, and how it aligns before you run the full backsplash.
Details complete your backsplash, making it last a long time. Caulk around the edge of peel and stick tiles around sinks or counter areas to prevent moisture from getting in. A water-based polyurethane sealant is used to seal painted designs so they are easily cleaned.
Ensure that all the cut margins of the beaded board are properly waterproofed with waterproof paint/coating.
After you have completed your project, take "after" photographs of your construction from the same angle and light conditions as you took your "before." You will take "after" photographs of your project with the same angle and light as you did for your "before." This side by side comparison will serve as a visual reward to you for ALL your hard work and will give you a sense of the transformation! It's also sufficient evidence that DIY backsplash makeovers can work wonderfully.
The peel and stick tiles or removable ones make for a grand entrance without harming the walls. They're simple to install and 100% reversible.
Yes - provided that the surface is clean, smooth, and dry. Correctly cleaned and lightly sanded surfaces have better adhesion.
Typically, durability ranges from 3-5 years or longer with appropriate installation and maintenance. In some areas, especially those exposed to high heat or humidity, additional sealing may be necessary.
Yes, take the covers off outlets to achieve a cleaner look. For outlets, use a utility knife and cut slowly to get sharp edges.
Yes, most peel and stick tiles will be able to be slightly moved shortly after attaching. Slowly peel, carefully re-press to avoid wrinkles.
All great kitchen transformations begin with one simple decision to get started. Any DIY backsplash project starts with a lack of confidence, a measure of hesitation, and a kitchen that isn't even bad but just okay. However, it is usually these same projects that culminate in the greatest success and pride in the completed room. The reality is, there are mistakes made, and the majority of them are easy fixes. Tiles can be adjusted; paint can be touched up, and edges can be cleaned and corrected. There is only one real disadvantage, and that is waiting for the "right time," but until that time. Don't wait, take the first step today. Take a no-dig "before" picture today, just because you don't make any changes in the others. That one picture is just the beginning of your kitchen's transformation, and in a short period of time, you'll be able to look back and see it come a very long way.


